Your agency is unique. It’s refined, a cut above the competition, and you choose style and wording carefully when interacting with customers and prospects alike. So, doesn’t it make sense that your sales tools for your website hold to the same standards?
At Advice Local, we wanted to develop a sales generation tool for agencies like yours, with total customization and control available from the get-go. That’s precisely what we did, and now we’d like to teach you how to better customize your new sales widget for everyday use!
Getting Started – A First Look at the Sales Tool Website Widget
Before we dive into a step-by-step rundown of the customization possibilities, let’s first look at Advice Local’s sales tool for your website. We’ll start with exploring its outward appearance and uses for the visitor to your website.
Shown here is the sales widget in its minimized and expanded state.

The sales widget is quite straightforward. Upon expanding the widget from your agency’s website or homepage, the prospect will be greeted with your logo and copy. Below that, they may fill in their business information and personal information before running a free online visibility report.
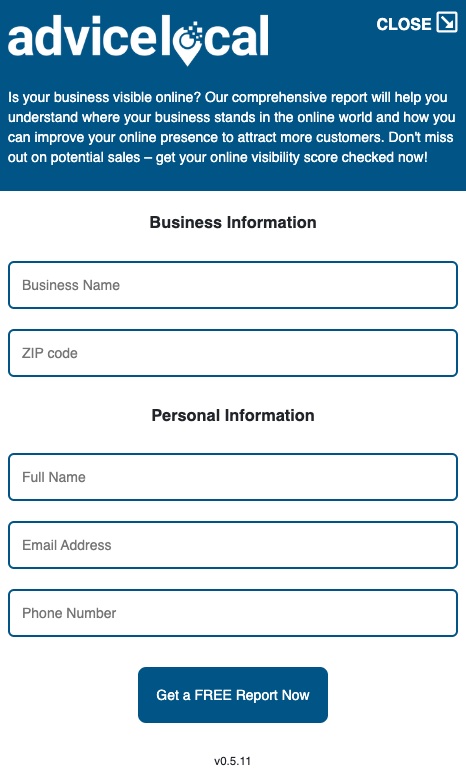
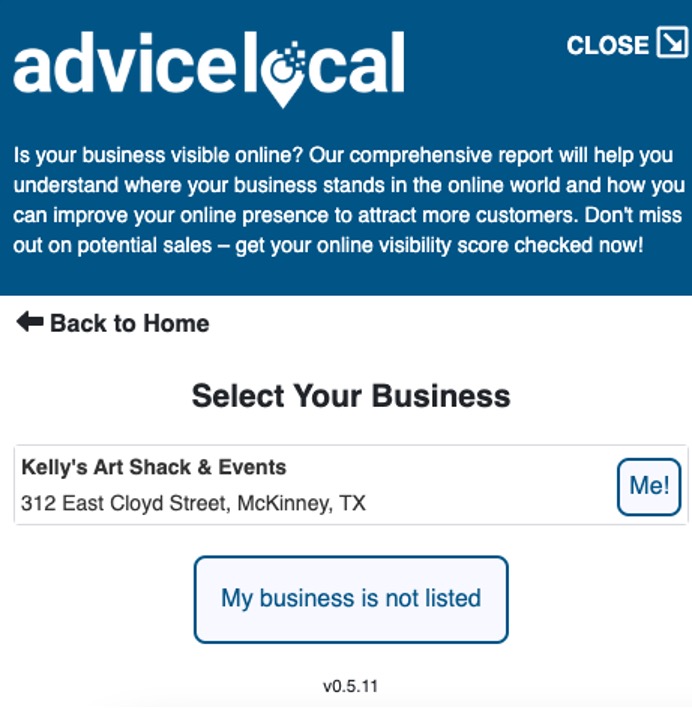
Once the prospect selects “Get a FREE Report Now,” the widget will pull in the necessary business information. The prospect will then select their specific location from the list of available options or select “My business is not listed.”
From there, the widget will begin the process of running the free online visibility report. On the screen, the prospect will be presented with an overview of the Visibility Score, and have the option to click to “See The Full Report” onscreen.
If they choose to view the report onscreen, a new browser window opens where they can examine the report. Otherwise, the report is sent directly to the prospect’s email – with your custom wording and agency information included. That way, the prospective client is prepped for future contact with your team.
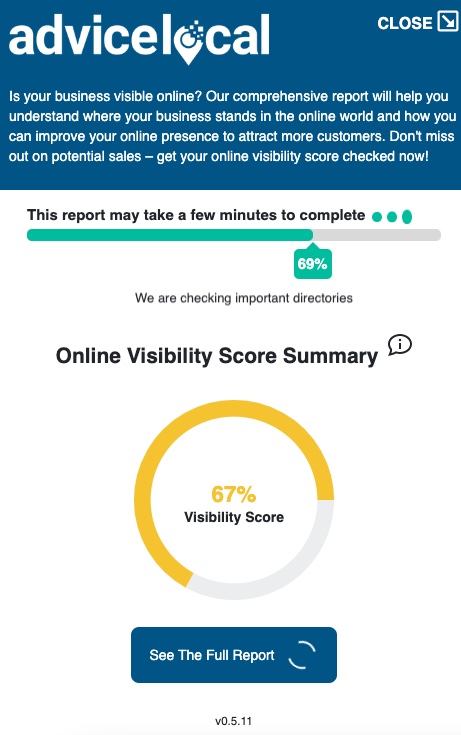
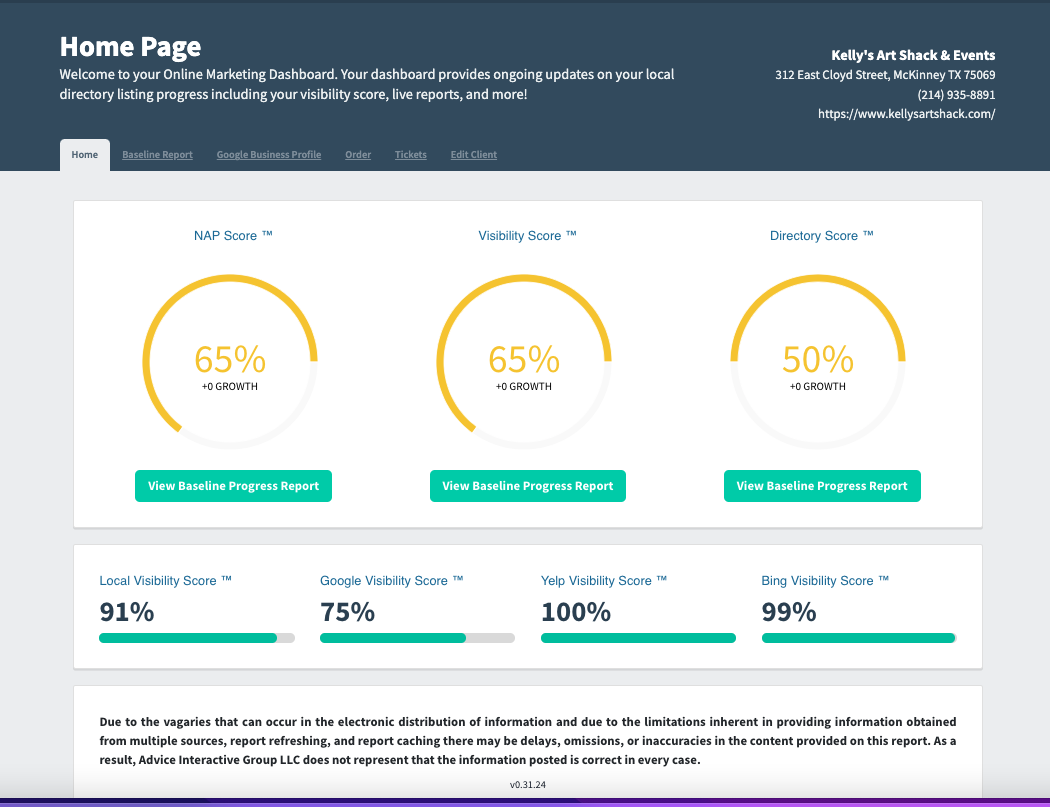
The results of the online visibility report will also appear in your Advice Local partner dashboard, allowing your sales team access to key information needed to make a quick sale. The prospect will then receive an email with their visibility report and any other information that you provided within your email template.
Overall, it’s an extremely simple and effective way to gather sales information without wasting manpower or resources.
Now that we have covered the experience for the site visitor utilizing the sales tool we have created for your website, let’s discuss where you can access this sales tool to customize it to match your agency’s brand.
Accessing the Sales Widget Within Your Agency Dashboard
Before you dive into customizing your new sales widget, you’ll need to locate it within the partner dashboard. And by design, like everything else to do with the widget, it’s simple!
First, log in to your partner dashboard via the Advice Local website. You’ll start on the main page of the dashboard, which will look something like the example below.
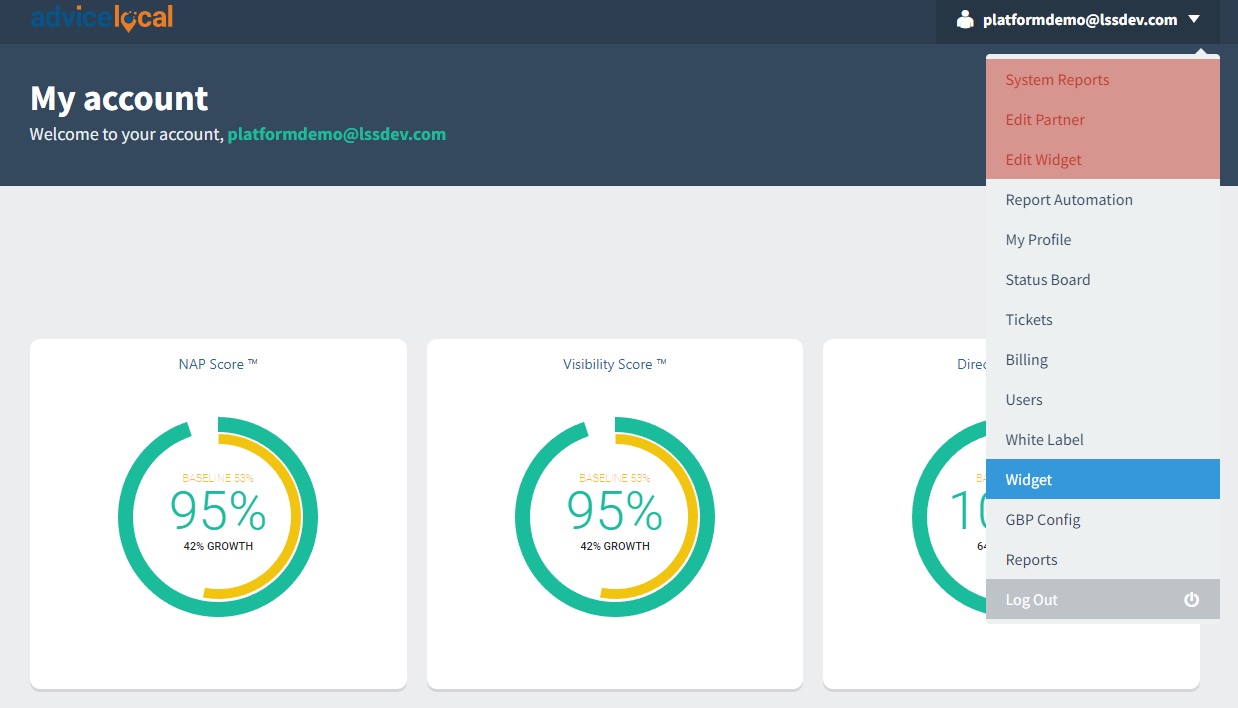
Look to the top right corner – you’ll see your email address. Click here and open the admin panel drop-down box to access additional information, commands, reports and tools. Click the item that says “Widget.”
Once you click the widget function, you’ll have access to the sales widget editor. Here you can customize your sales widget, and access the code allowing you to implement the widget on your website.
Now, we’ll move on to customizing the sales widget step-by-step.
Customizing the Sales Widget for Your Agency Website
With a basic understanding of how the sales widget functions, let’s look at how to customize your new widget before pushing it live on your website.
Personalization and branding can be considered the most important features of the sales widget. For that, navigate to the “Global” category, where you can insert your agency’s logo and select the type of font you want to use. It looks something like the below image.
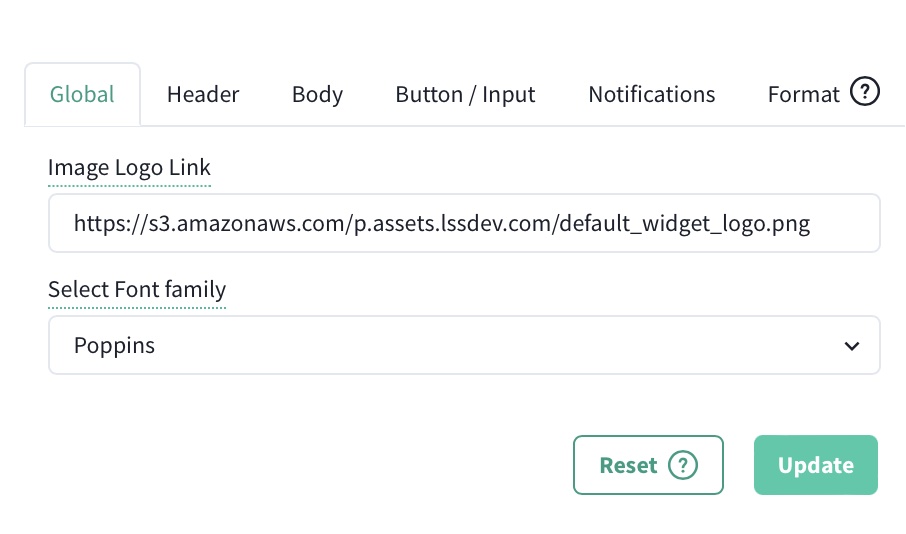
In the place that says Image Logo Link, add the link to your logo that you have uploaded to your agency website.
Now, let’s move to the “Header” tab. In this section you can select the widget’s primary background color. This color appears behind your logo at the very top of the sales widget itself. You can also change the font color if you’d like.
When you use the Chrome browser you’ll have more color preference options, including the ability to enter the exact color codes you use on your website. In Safari, you’ll have a color selector to choose from (or use the dropper to select a color from something else already on the screen).
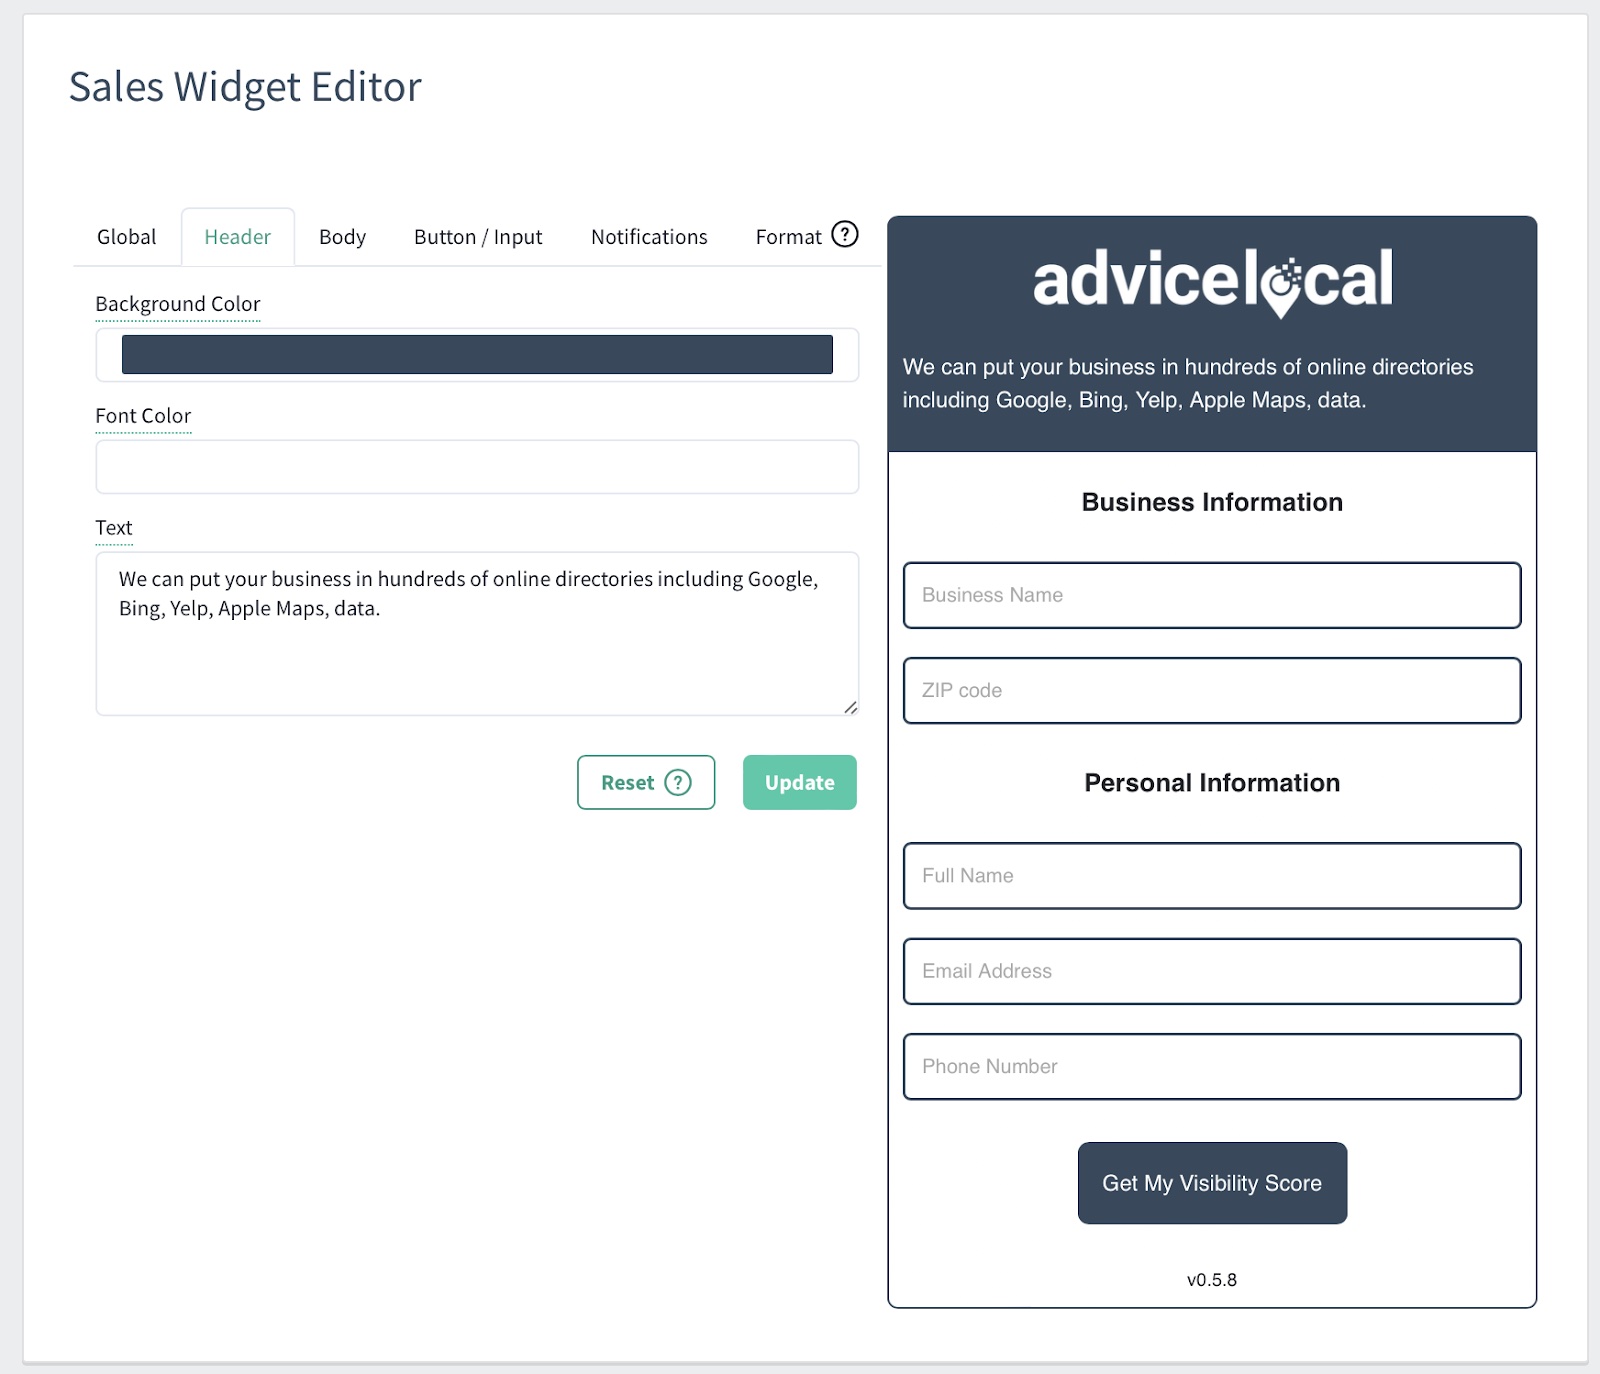
In the “Header” tab, the text box is one of the more important components. You can insert custom copy related to your agency, mission statement, or how you wish to help customers. This message will appear on your website when the site visitor expands the widget to generate their free report.
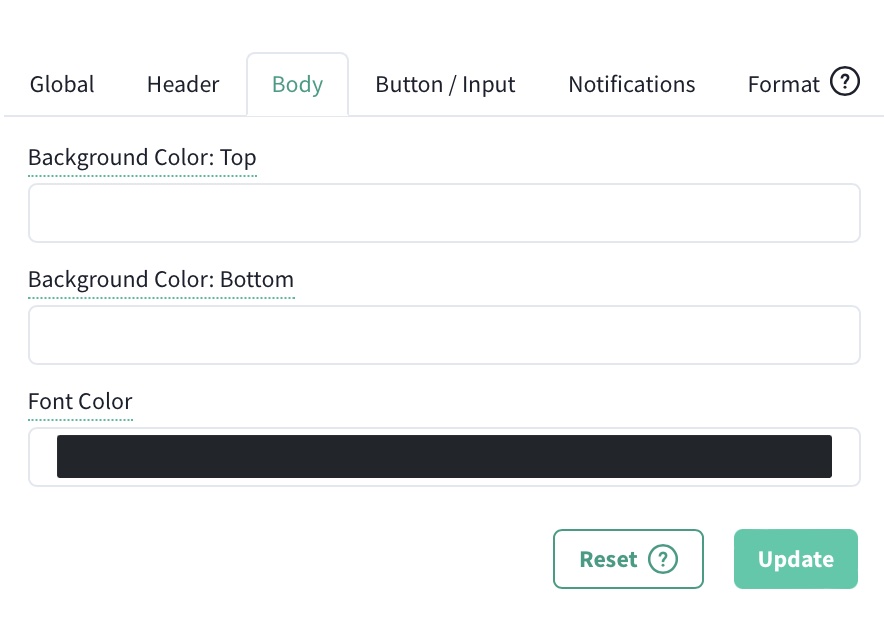
Next, navigate to the “Body” tab. In this section, you’ll have a chance to edit the background color on the main body of the sales widget. We recommend choosing a color that’s pleasing to the eye and also easy to read, as prospects will enter text in this section.
Further, you can also change the font and the background color for the bottom section.
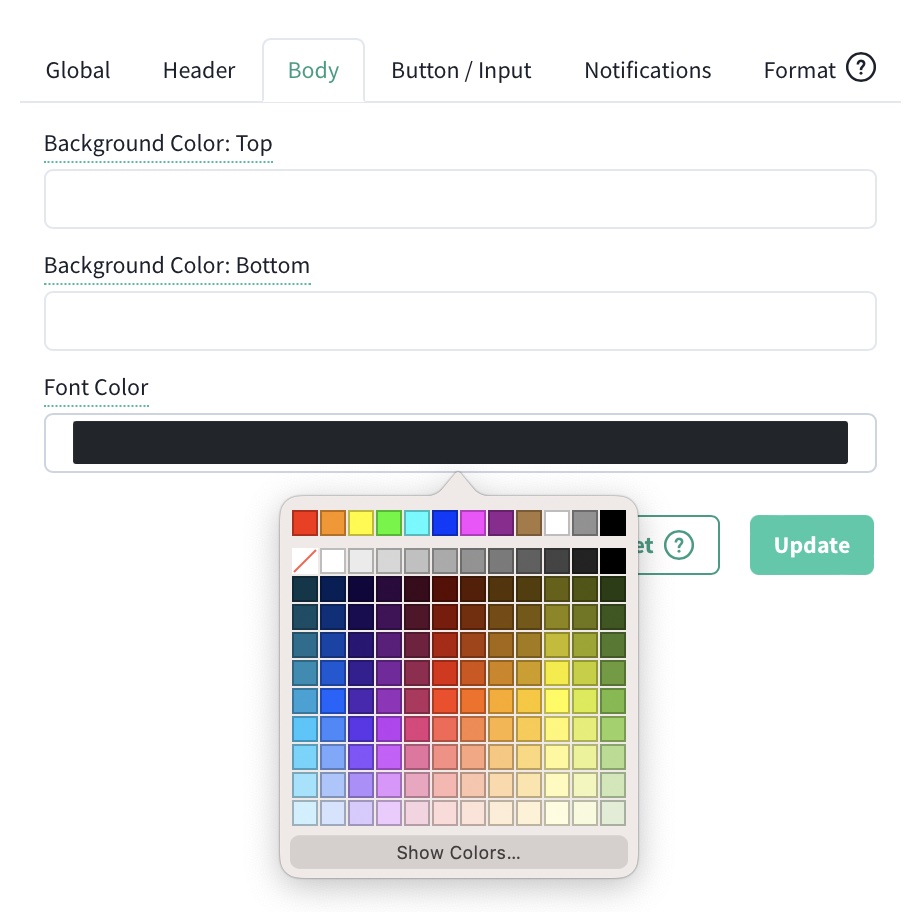
But what if you don’t have a specific color in mind? You can choose from popular color options by using the drop-down box. Click on the font color section and choose what works best for you from the color picker.
Once you’ve selected the important colors that set your agency apart from the competition and turn eyes your way, it’s time to choose the perfect wording for your sales widget.
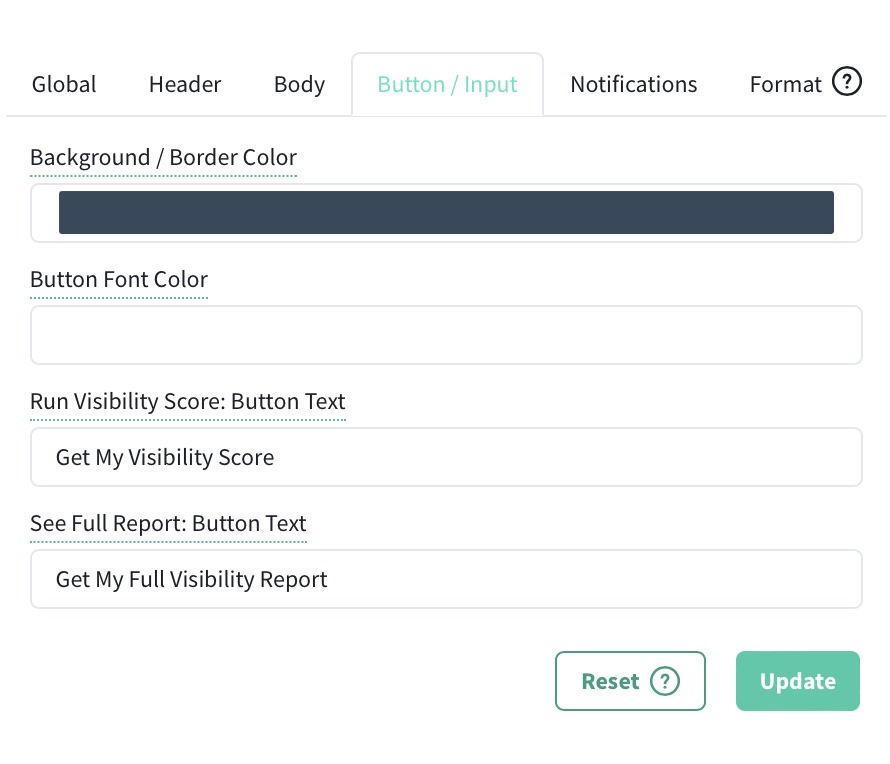
Get ready to set up the “Button/Input” tab. This includes the background/border color of the button itself, the button font color, the text included on the button – and the text for viewing the full report. You can customize each aspect of this to best suit the wording your agency prefers.
Next, we have the “Notifications” tab, which features an email BCC, email subject line and email body. We recommend adding your email address in the BCC, so you’ll know right away when a free report has been generated via your agency website.
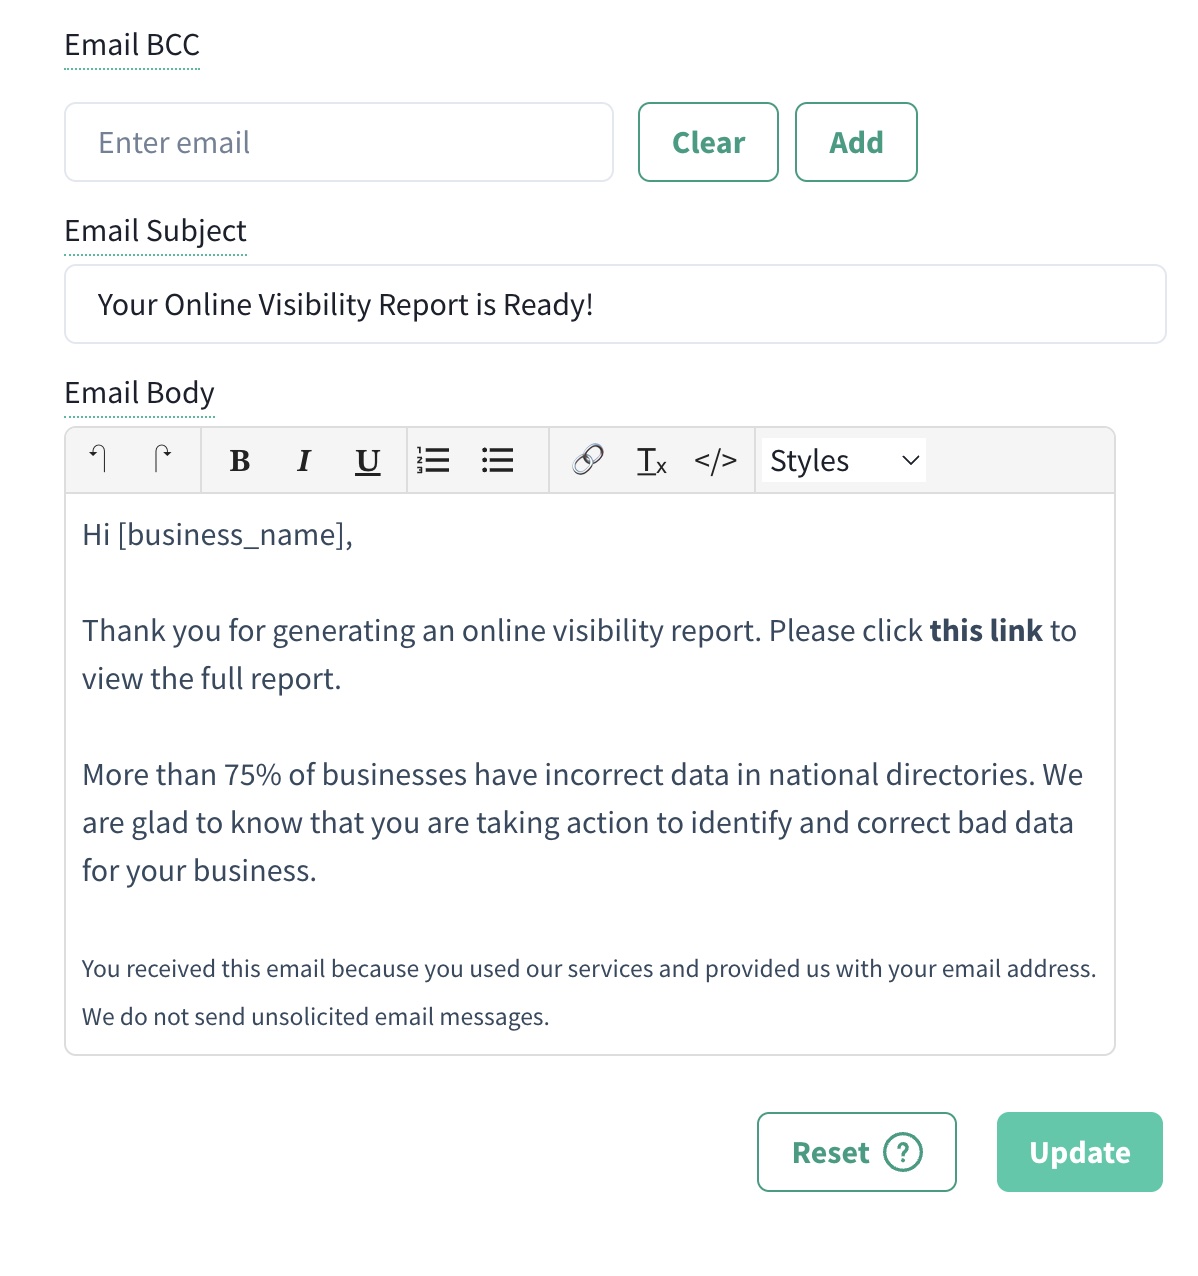
You can make the email body content as personal or professional as you like – it’s yours to work with and mold as you see fit.
You’ll note the email body begins with “Hi [business_name].” It’s best to include this code to ensure the widget pulls the business name from the information provided by the prospect.
If you don’t want to use “Hi,” change it to something more your style. You could throw in a “Hey,” or “How are you,” (and so on) to fit your needs. It’s very important to leave the “this link” text untouched, as we have code in there that will link the free report to your partner dashboard for the prospect.
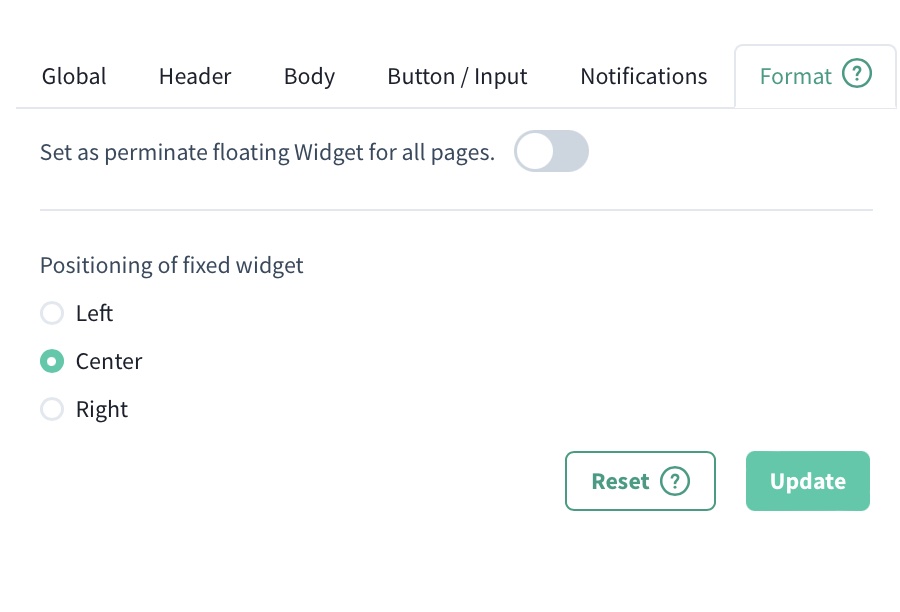
And finally, we have the “Format” tab. From this final tab you can choose whether or not to permanently float your sales widget on each page of your website. You can also change the positioning (from left, center, or right) depending on your space, and where you’d like the widget to appear to best catch attention.
Inserting Your Customized Sales Widget
Once you have fully customized the sales widget, it’s time to add the widget on your website.
From the Advice Local dashboard (in the same area as the customization tools), you’ll find the Sales Widget Code. This code changes as you enter your various customizations. Therefore, before you copy/paste the code to your website, it’s best to wait until you’ve uploaded your logo, finished selecting coloring and font, adjusted the other settings, etc.
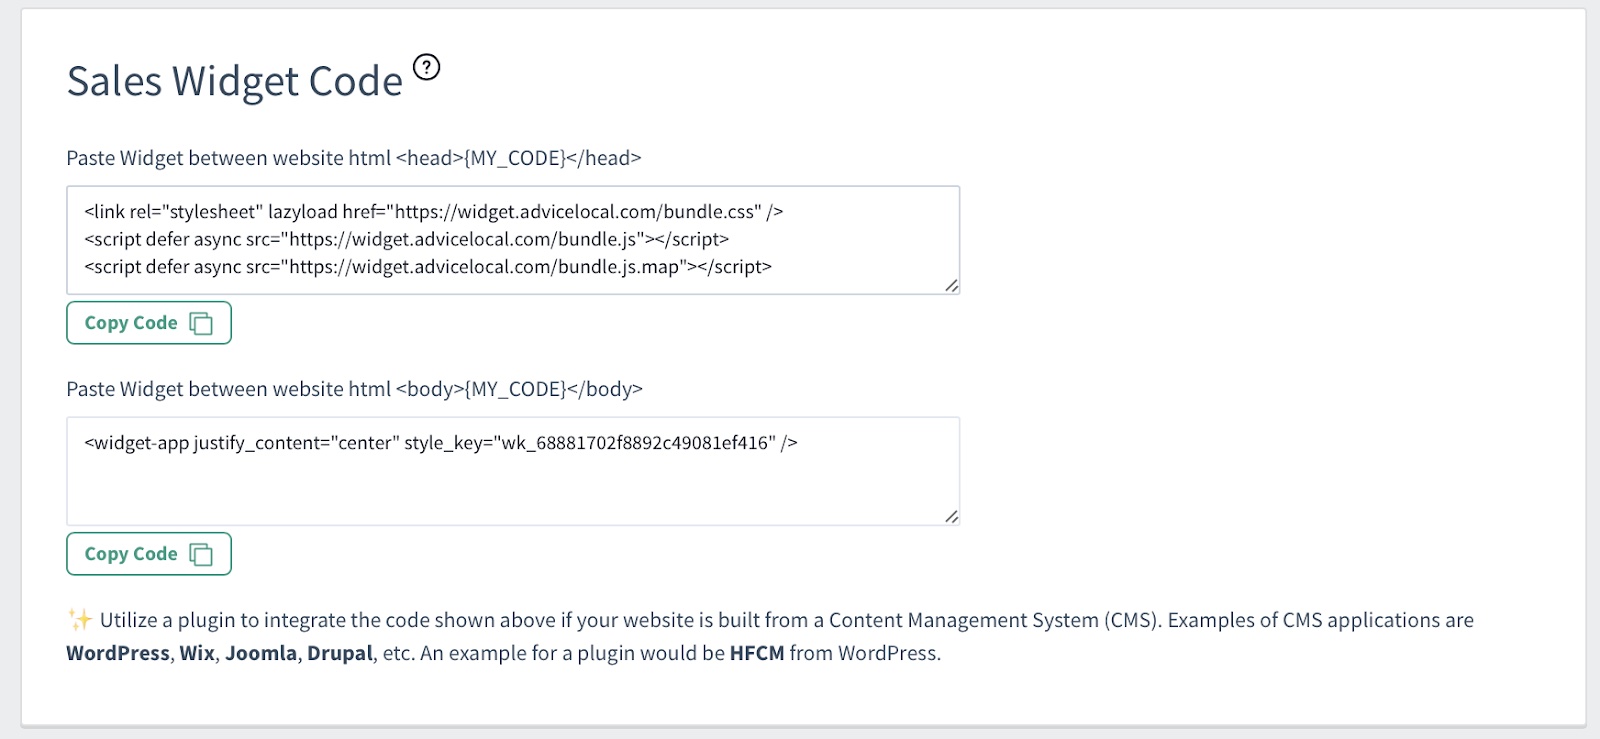
As you can see, depending on the type of content management system (CMS) your website uses, you have a few options. For example, if you have a WordPress website you can install a plugin to handle the code implementation for you. Google Tag Manager is also an option for adding the code into the header.php file on your website.
An alternate method is to copy and paste the sales tool website widget code directly into the header.php on your website within the <head> and <body> tags.
And once you add the code to your website and click save, your widget will appear on your agency website, right on the homepage, for easy access! If you cannot see the widget right away, you may need to clear your website and browser cache.
Ready to Get This Powerful Sales Tool for Your Agency Website?
For current Advice Local partners, the new widget is already turned on in your partner dashboard. Please keep in mind that if you’re using the legacy sales tool, you’ll no longer be able to make customizations to the legacy sales tool or landing page. Please contact your account manager if you have questions or concerns regarding this.
If you are not yet an Advice Local partner, request a demo right away. You’ll definitely want to get our sales tool for your agency website! Call (214) 310-1356 today to learn more.

